Fades can be tricky to ask for despite being so common. Get it wrong and you could end up with a completely different fade to the one you actually wanted. So, here’s everything you need to know about 2 to 3 fades.
This article contains affiliate links. If you purchase through our links, we may earn a small commission at no extra cost to you. This helps support Ready Sleek.
Let’s get to it.
What Does A 2 To 3 Fade Look Like?
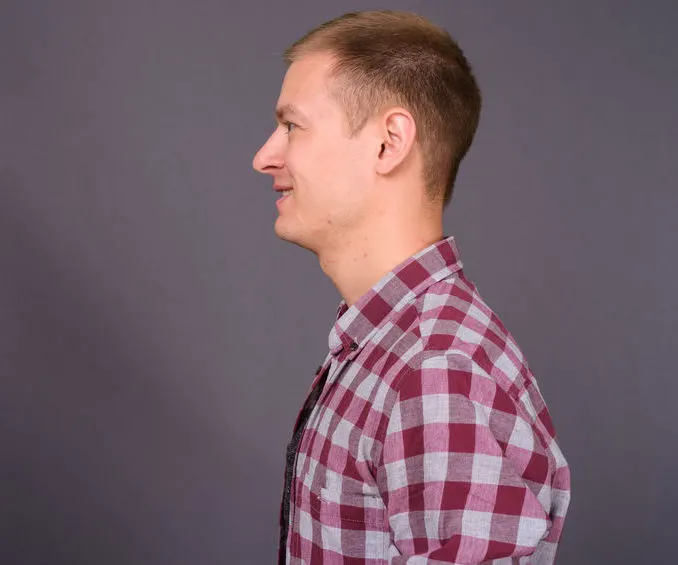
A 2 to 3 fade looks like this:
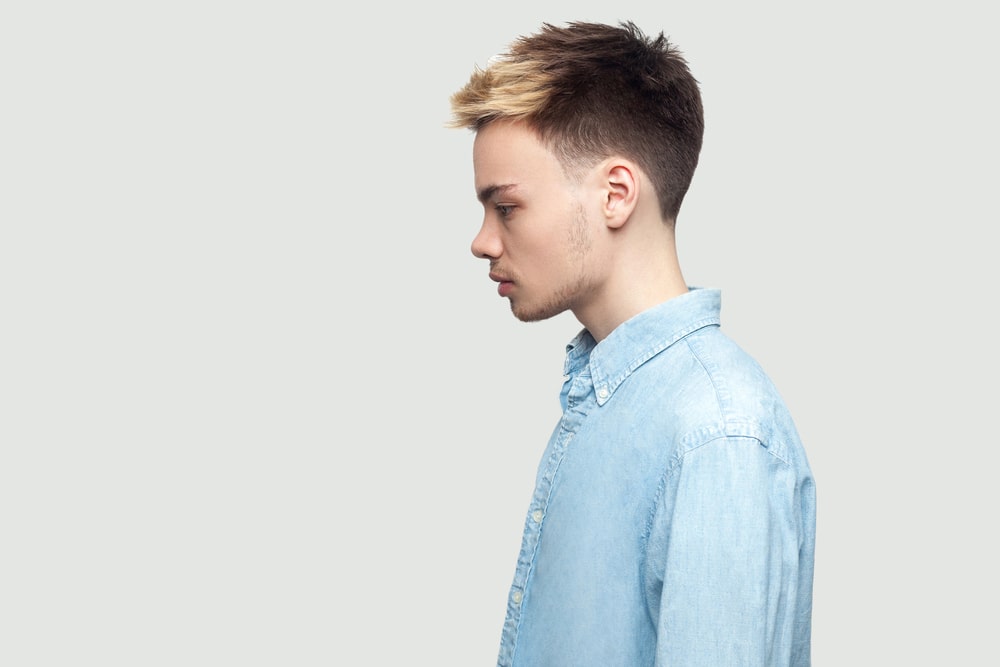

As you can see, the transition from the #2 into the #3 is gradual and seamless, with no harsh lines separating the two lengths.
The seamless switch from one length to the other is what creates that classic blurred appearance that all good fades should have.
The 2 to 3 fade in the photograph above happens to be a “high” 2 to 3 fade. I’ll discuss low, mid, and high 2 to 3 fades in more detail later on.
The great thing about the 2 to 3 fade is that it’s short but still quite subtle. It isn’t quite as striking or bold as a skin fade or even a 1 to 2 fade.
It’s a good option for people that are looking for a fade that doesn’t draw too much attention from the hair on top. The 2 to 3 fade is long enough to achieve this.
The higher up the fade is, the more attention-grabbing it’ll be.
But overall, the 2 to 3 fade benefits from an understated simplicity.
It’s important to note that it’s still short enough to remove a significant amount of hair and fullness from the sides when looking from a front-on view.
This is important because it can have a slimming effect on the face and also defines the jawline.
What Exactly Is A 2 To 3 Fade?
The 2 to 3 fade is an effect where the bottom of the sides and back are clipped down to a #2 length (¼ inch) before transitioning into a #3 length (⅜ inch) further up. The fade can be “low”, “mid” or “high” depending on how high the transition occurs.
While there is a good three millimeters difference between a #2 length and a #3 length, there are no harsh lines separating the two different lengths.
A barber will achieve this by gradually increasing the length from the #2 to the #3 at a certain point up the sides and back.
To do so, they will usually make use of the lever on the clipper. “Closing” the lever with a #3 guard on will place the blade at its lowest cutting position.
This will enable them to trim down ever so slightly shorter than with the lever “open”. Closing the lever will allow them to fade out the harsh line separating the #2 from the #3 length.
This graded cross over from one length to the other is what defines the fade. The 2 to 3 fade is no different.
2 To 3 Fade Examples
Here are a few examples of this common fade length to serve as inspiration. Remember, a 2 to 3 fade on the sides/back can be included in practically any hairstyle you can think of.
There’s an endless number of things you can do with the hair on top. The 2 to 3 fade is an effect and not a specific style. It can be used to compliment any hairstyle up top you can think of.
2 To 3 Fade Long On Top
Here’s an example of a 2 to 3 fade on the sides with the hair on top left long and scissor-cut. More specifically, this should be called a crew cut.

Crew cuts are a buzz cut variation where the sides are clipped short and often faded, while the hair on top is left long and graduates in length from the front to the back.
The 2 to 3 fade is a great option for the sides when you’re going for a crew cut.
It’s short, but not so short as to draw attention.
Crew cuts are known for simplicity and the sides are rarely clipped down all the way to a skin fade as you might with a high and tight, for example.
2 To 3 Fade Comb Over
Here’s an example of a comb over with a 2 to 3 fade at the sides.


A comb over is literally where the hair on top is left long compared with the sides and back and – well, combed over to one side.
It shouldn’t be confused with a comb-over that refers to an attempt at hiding thinning hair on top.
Instead, this type of comb over is intentional and isn’t attempting to hide anything at all.
It’s yet another good option for the hair on top when you’re rocking a 2 to 3 fade on the sides.
Buzz Cut With 2 To 3 Fade
Here’s an example of a #4 buzz cut on top with a 2 to 3 fade at the sides and back.
It goes to show that the 2 to 3 fade can be combined with very short hair up top, as long as the hair on top is longer than that on the sides.
This type of hairstyle is extremely low maintenance, simply due to the fact that the hair is so short all over.
It’s not really long enough to style properly and the sides and back are short enough to prevent strays and flyaways from really becoming an issue.
Overall, it’s a sort of “set it and forget it” hairstyle that won’t really take up too much of your time.
2 To 3 Fade: Low Vs Mid Vs High
2 to 3 fades can be split into “low”, “mid”, and “high” depending on how high up the sides and back the #2 length reaches before it starts to transition into the #3 length.
Let’s talk about each of them in turn and also briefly discuss the 2 to 3 fade taper as well.
Low 2 To 3 Fade
A low 2 to 3 fade will have the bottom of the sides clipped down to a #2 length (¼ inch) before gradually transitioning into a #3 length around half an inch above the ear.
Low fades such as this are appealing to many people because they’re quite subtle. With a low 2 to 3 fade, the hair isn’t very short either.
Overall, the hair is pretty long at the sides (relative to a skin fade, for example) and the shortest length (#2) doesn’t reach very high up.
It’s subtle – for some, this may be ideal.
Mid 2 To 3 Fade
A mid 2 to 3 fade will have the sides clipped down to a #2 length (¼ inch) before gradually transitioning into a #3 length (⅜ inch) approximately one inch above the ear.
Mid fades are more attention-grabbing than low fades and a mid 2 to 3 fade is no exception.
The reason for this is that more of the sides and back are clipped down to their shortest length before starting to gradually increase.
With this example, around half of the sides and back will be trimmed down to a #2 length, as opposed to a low 2 to 3 fade where only around a third would be.
While a #2 length isn’t that short, it’s still short enough to make a mid fade more eye-catching than a low fade would be.
It’s one to think about if you’re looking to make a statement, but not quite ready to go all the way up to a high fade just yet.
If you’re looking for a comparison of mid fades and high fades in more detail, read this article I wrote.
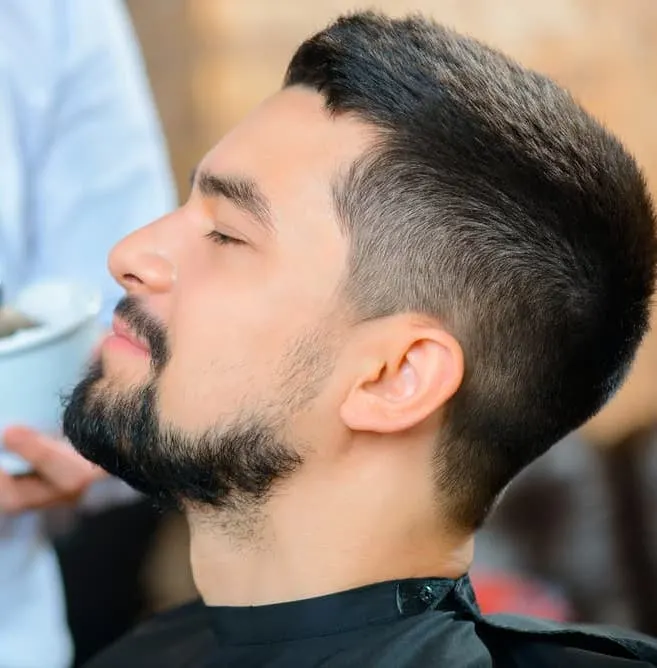
High 2 To 3 Fade
A high 2 to 3 fade will have the sides clipped down to a #2 length (¼ inch) before gradually increasing into a #3 length (⅜ inch) around the level of the temples.
High fades aren’t for everyone. They’re high enough to make the fade really stand out as a core part of the overall style.
This is because most of the sides and back will be clipped down to the shortest length (#2) before starting to transition.
The good thing about the high 2 to 3 fade is that it’s still long enough to not draw too much attention from the hair on top.
After all, it’s not too different from a basic, unfaded 2 on the sides haircut.
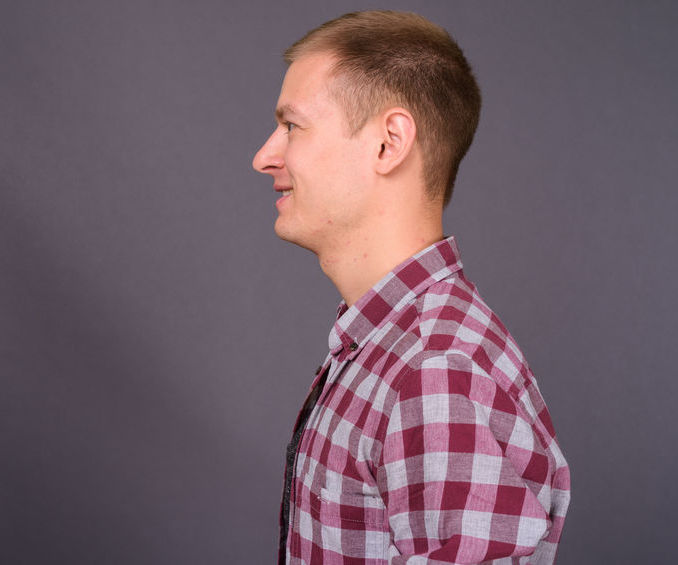
2 To 3 Taper Fade
A 2 to 3 fade taper will have the very lowest part of the sides clipped down to a #2 length (¼ inch) before gradually transitioning into a #3 length (⅜ inch) around the top of the sideburns.
Essentially, think of a taper fade as the lowest type of fade you could get. It’s even lower than a low fade.
A taper is defined by the fact that the shortest length (in this case the #2) doesn’t go higher than the top of the sideburn before it starts to gradually increase to the #3.
The back of the neck is also very subtly faded, with the #2 length only reaching around an inch above the neckline before it starts to transition to the #3.
Unlike low fades, mid fades, and high fades, with tapers, the #2 length at the sides and back don’t merge with each other.
The sides are slightly faded and the back is slightly faded, but the two faded areas remain separate from each other and don’t join up above the ear. This is because the faded area simply doesn’t reach high enough.
Conclusion
There you have it. Hopefully, everything you could ever want to know about this very specific type of fade.
What it is, what it looks like, and more.
Enjoy.
🏆 Recommended Grooming Tools
- Philips Norelco Multigroom 9000 — Best overall trimmer for beard & hair
- Philips OneBlade 360 — Best budget trimmer & shaver
Written & Fact-Checked By
The Ready Sleek Team
Grooming obsessives since 2019. Evidence-based advice you can trust.
Related Articles
Axel is the founder of ReadySleek and has spent over 5 years researching and testing men’s grooming products, skincare routines, and hair loss treatments. His work combines hands-on product testing with insights from dermatologists and trichologists to deliver evidence-based grooming advice.
He specializes in men’s skincare (including ingredient analysis of retinol, niacinamide, and SPF), hair loss science (minoxidil, finasteride, hair transplants), men’s fragrance (with 80+ colognes personally tested), and body grooming techniques.
When he’s not reviewing the latest grooming products, Axel focuses on making complex grooming topics accessible and actionable for everyday guys.