As with a beard, a mustache needs some upkeep in order to look its best. You might have been put off by the tedious task of trimming it with a pair of scissors. Clippers haven’t taken your fancy either; too large and cumbersome.
Although it does still require a steady hand, using an electric trimmer is a quick and easy way to achieve precise results.
This article will focus solely on trimmers. Not clippers, and not scissors. It’s important to note that I’m not advocating one method over another. I’m simply giving you the facts and allowing you to make a decision based on personal preference.
Charge it up – let’s get to work.
How To Trim A Mustache With Trimmers
Here’s a comprehensive, step-by-step routine for trimming a mustache with an electric trimmer. You won’t need much to get it done, but be prepared to avoid unnecessary interruptions mid-routine. Disorganization is often a hindrance when it comes to men’s grooming.
The objectives:
- To produce a neat, clean, even mustache with enough length to style as per your wishes.
- To lighten the bulk of the mustache.
- To create a neat line immediately above the upper lip, leaving no strays crawling toward the mouth.
- To ensure that nose hair is swiftly removed as an when needed.
Although technically a trimmer is all you’ll need, here’s a recommended shopping list:
- Beard trimmer (of course)
- A beard brush or mustache comb
- Beard oil (ideally)
- Beard wax (ideally)
Please note that these instructions are general and not personalized – they may not be suitable for your specific circumstances. See footer for disclaimer.
1. Trim the bulk of the mustache
This is the point where you decide upon your length. As mentioned, you’re restricted to the lengths available with your trimmer. The lengths may be numbered like a clipper (i.e #1, #2, etc), or may simply have the lengths stated in millimeters.
You may already have a style in mind – that’s fine. Just note that if you’re aiming for a particular style, be sure to leave enough length to achieve it.
Don’t trim down to 4mm if you’re aiming for a Handlebar at the end of it. In that case, for example, here would need to be enough length to curl it upwards at either side. In contrast, if you’re hoping to style a Painter’s Brush, you won’t need so much length.
Once you’ve chosen a length, prepare your trimmer by adjusting it to the appropriate setting.
The first step is to reduce the bulk of the mustache itself. I do feel that the most efficient way to do this and still achieve a natural-looking result would be to trim with the grain.
“With the grain” simply means “in the direction of hair growth”. Broadly speaking, mustache hair grows downward and towards the mouth.
2. Trim the upper lip line looking straight ahead
Now that you’ve trimmed the bulk of the mustache to your chosen length, it’s time to neaten things up.
The lip line is the upper border of your upper lip. It’s important to keep this line clear of any stray mustache hairs creeping over it. Although this is more crucial with certain styles, in general, allowing mustache hair to creep over the upper lip is almost universally considered poor grooming.
The easiest way to clean up the lip line is to use the naked blade of your electric trimmer to trim the tips of any stray mustache hairs you see creeping over the upper lip.
Making a half-smile face with your mouth slightly open is a good way of making the lip line more horizontal and making it easier to trim. You should be looking straight ahead at this point.
To do the sides, turn the blade sideways and follow the contour of the upper lip toward the corners of the mouth. Again, all you’re doing is neatening things up here.
Go nice and slow here. The lip is pretty sensitive, as you’d expect. Nicking it with the blade of a trimmer doesn’t feel great.
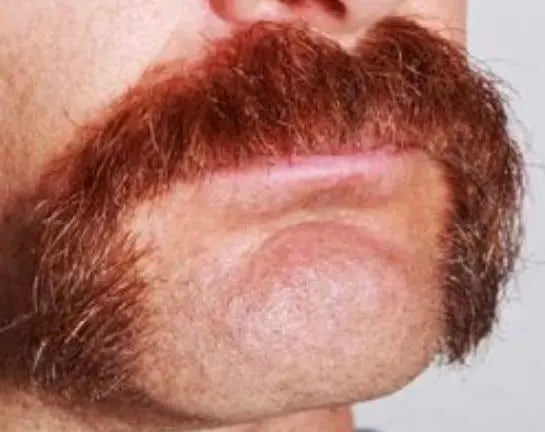
3. Tilt the head downward and spot any strays
This may sound odd, but bear with me. By now, you’ll most likely have a very reasonably trimmed lip line. You could quite comfortably and confidently leave it at that.
However, if your objective is perfection, there’s just one extra step.
Tilt your head downward and have a look in the mirror. It’s quite likely that you’ll see some of the edges of the top layer of mustache hair sticking out toward the upper lip. These are difficult to spot while looking straight ahead.
4. A final glide from top to bottom
Read through this and decide whether or not you’re truly comfortable with this step. It could get dangerous if you don’t have a steady hand.
The aim of this step is to make the mustache as neat and as even as possible, particularly when looking at it from the side.
Using the naked blade of the trimmer, very gently glide and brush across the top layer of the mustache from top to bottom. This should trim any stray hairs that may be sticking out very slightly.
5. A little wax goes a long way
Mustache wax is wonderful stuff. Being used so close to the nose, it’s designed to smell amazing usually.
But its scent isn’t its primary purpose, of course. What it does is flatten out any strays that may still be sticking out and keeps them that way.
Wax has the benefit of having a degree of hold, which means that once it’s applied, you can sort of set it and forget it. It’s particularly great for longer mustaches which can get more and more untidy as the day progresses.
Trimming A Mustache With An Electric Trimmer Vs Scissors
Here’s the truth – they both work. But that isn’t a very helpful answer. Let’s focus on how they differ.
Scissors do allow for utmost precision, as you’d expect. Being able to meticulously snip each strand and sculpt the exact shape you’ve got in mind is liberating. It also frequently leads to a more natural-looking result.
The electric trimmer, on the other hand, isn’t quite so “artistic”. It’s a rough-and-ready, “let’s just get it done” method of achieving quick success. The beauty of it is that it guarantees an even trim.
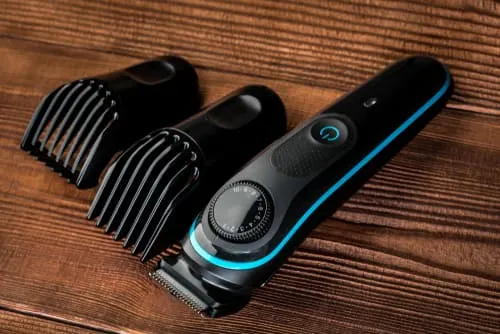
You just set it to the adjustable length of choice and let the trimmer attachment do the rest.
The downside of this is that you’re unable to have much control over length, as you’re restricted to the available guard lengths.
When it comes to ease and comfort, however, the motor does the work when trimming with an electric trimmer. When using scissors, you’re providing the power as well as the technique. This can become tiring, as well as tedious.
Ultimately, if time is restricted, a trimmer would be a better way to go. There’s no reason why you can’t reach for the trimmer when you’re in a rush, and treat yourself to a scissor-cut when you’ve got more time.
If you decide to go for the trimmer, here’s a reminder of what to look for:
- To minimize irritation, look for a trimmer with hypoallergenic blades.
- Choose a trimmer with enough length options to meet your needs.
- A multi-purpose trimmer is cost-effective. There’s no need for a specific “mustache trimmer”. In fact, some multi-purpose trimmers also come with a nose hair trimmer which would come in very useful as well.
Conclusion
There you have it. A simple method of trimming your mustache with a trimmer that should guarantee excellent results each and every time.
You’ll get better over time. Mistakes are common in the early phases, but having a step-by-step routine should minimize them and avoid the need to “wing it”.
If you aren’t sure whether you’d prefer to use scissors or an electric trimmer, there’s no harm in trying out both. Once you’ve selected a preferred method, take steps to perfect it.
Hope you found that useful.
Ready Sleek founder. Obsessed with casual style and the minimalist approach to building a highly functional wardrobe. Also a fan of classic, vintage hairstyles.


