Light, airy, textured, and just the right amount of mess. You’re about to learn exactly how to get fluffy hair in the simplest way possible.
After I go through the 3 core secrets to getting it, I’ll give you a step-by-step tutorial you can use for an effortlessly soft and layered finish each and every time.
Let’s get to it.
The 3 Secrets To Getting Fluffy Hair
Men with different hair types can all achieve fluffiness by simply sticking to core principles.
Here are three that will always serve you well.
1. Having Enough Length
Longer hair will be easier to build volume, lift, and texture with.
The shorter the hair, the tougher it’ll be.
I find that 4 to 6 inches is a sweet spot. Pull the hair at the front vertically down your face. If it reaches beyond the bridge of the nose, you’ve got some good length to work with.
Having said all of this, hair that’s longer than this range may well start to way itself down. After a while, you might find that the hair flops down flat instead of staying fluffy, simply due to the weight of the hair.
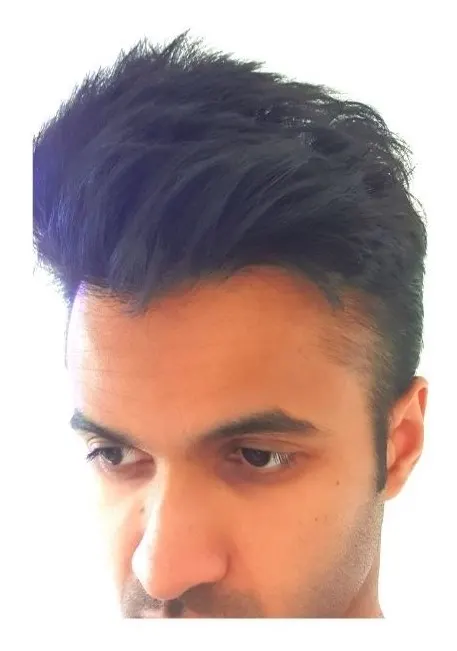
So, the key is having enough length but not too much length. The exact length that’ll work for you will depend on the natural thickness of your hair to an extent.
So, experiment and find your ideal range – but 4 to 6 inches is a good place to start.
2. Achieving “Messy Control”
“Messy control” is the objective. It’s when you’ve got pretty classic bed head but it looks textured, voluminous, and just tidy enough to suggest that you’ve put some effort in.
The end result should be light, soft, and “messy but tidy”.
The tutorial below will go through how to achieve this in more detail.
3. Getting A Matte Finish
If what you want is fluffy hair, you’ll want to avoid shiny products that lead to slickness, definition, and gloss.
You don’t want shine.
You want to be using light, low shine, or matte products that allow you to easily build texture.
The choice of product is crucial.
It’s important to note that you don’t necessarily need to use a product at all.
When all you want is a light and fluffy finish, the result you get from simply using a pre-styler and a blow dryer may be exactly what you want.
Because you want the end result to be soft, if you do use a product, you’ll be better off using one that gives you a light to medium hold.
The stiff, shiny hold you’d get from a hair gel or water-based pomade wouldn’t produce the desired finish.
Hair waxes are also generally too shiny and too heavy to give you a fluffy finish.
Hair clays, on the other hand, are indeed matte but give you a medium-to-heavy gritty hold that wouldn’t be as soft as you’d like.
Examples of suitable hair products that give you a matte or low shine finish with a light to medium hold include volumizing powders, hair creams, hair pastes, and mousses.
These would be a better option.
How To Get Fluffy Hair In 7 Steps
Here’s a step-by-step tutorial you can use to achieve fluffy, light, and airy hair in a simple yet effective way.
Of course, the exact style you choose will depend on your preferences. But these steps will help get you a basic soft and textured hairstyle that you can fine-tune to your desire.
1. Get A Layered Haircut
Getting the right haircut is important when you’re looking to create a textured hairstyle. You’ll want the hair on top to be of various different lengths.
This way, the hair on top won’t just fall neatly and uniformly together. This is tough to build texture with.
It’s better to have hair that’s properly layered, with hair that’s of different lengths – this creates a separated appearance that’s easy to build texture with and great for producing a fluffy finish.
Let your barber know that this is what you want. Just remember that you still want to keep the hair long enough to produce the style you want. So try not to chop too much off.
Leave at least 4 or 5 inches on top and you should be fine.
2. Wash And Towel-Dry
It’s impossible to achieve a light and airy texture when the hair is weighed down by dirt, oil, and grime.
Washing it before styling is an important step.
Use a volumizing shampoo to cleanse while also adding lift and fullness. Don’t overdo it.
If you’ve got medium-length hair a quarter-sized amount will do.
Use the tips of your fingers to work it into your roots before rinsing it off.
Follow it up with some conditioner to soften it up even further.
The John Frieda volume shampoo and conditioner combo (Amazon Link) is affordable and should do the trick.
Once you’ve rinsed everything out, towel-dry the hair until it’s damp.
3. Use A Pre-Styler
Pre-stylers prime the hair, setting the stage for the styling to come. There are many different types of pre-styler out there and they can have a variety of different functions.
Some of them smoothen, some add volume, some thicken, and so on.
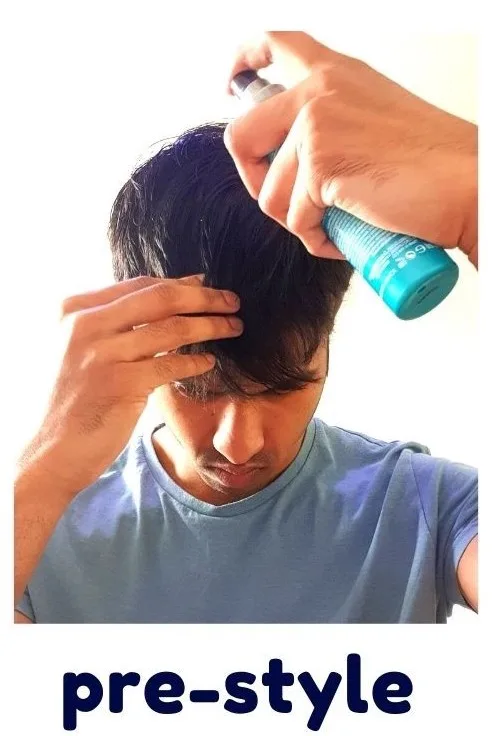
When you’re looking to achieve a fluffy end result, a volumizing pre-styler would be worth using.
Using it before you blow-dry will allow you to build even more volume and texture than you otherwise would have done.
A few spritzes of a simple sea salt spray would be enough. It’ll amplify the effects of the blow-dryer.
It’ll also make the hair a lot more responsive and easier to style. It’s great for producing beachy, windswept, wavy hairstyles because it adds just the right amount of grit to the hair.
This allows you to create soft and layered styles that are more likely to stay in place thanks to the grit.
Mousses can also be used as a pre-styler. This one by OGX (Amazon link) builds volume and makes the hair more responsive, similar to how sea salt spray would.
Here’s a blowout spray by John Frieda (Amazon Link) that I personally use to achieve the same effect. It’s applied before blow-drying to give the hair fullness and bounce, while also making it more responsive.
Work the pre-styler into the hair just as you would any other product. Coat the hair from root to tip by raking it through with your fingers in different directions.
4. Blow-Dry While Finger Tousling
Using a blow dryer with a concentrator nozzle will give you a lot more control. You’ll be able to focus the pressure and the heat on narrower and more specific areas.
When attempting to build volume like we are here, use a medium heat setting but a high-speed setting. Hold it around 8 inches away from the hair while drying.
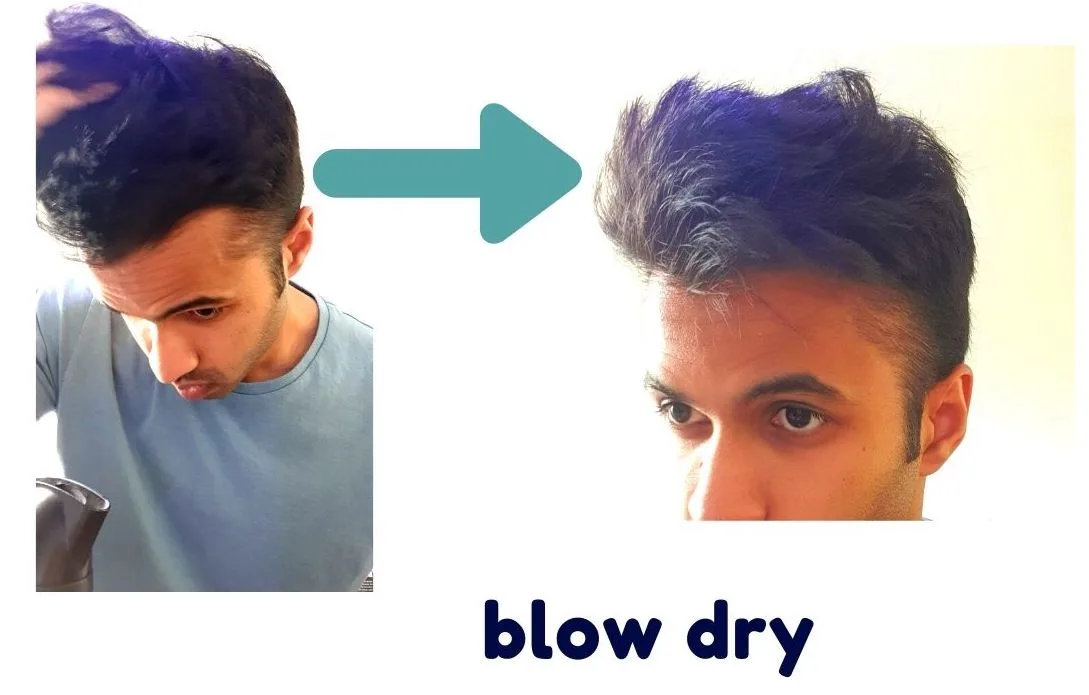
Start blow drying in every direction at first – up, down, left, and right. Do this no matter which direction you want the hair to eventually end up.
What this does is add fullness.
Target the roots of the hair – this is where the lift and the volume actually come from. Don’t make the mistake of simply drying the tips.
While blow-drying, you’ll really want to be working it with your fingers in the same direction you’re blow-drying.
Tousle and cup the hair with your fingers and even a gentle fist at times to really achieve a layered and textured appearance – it’s the best way to get strand separation in the finish.
Of course, you’ll want to finish up by blow-drying in the direction you want the hair to end up. If you’re looking for a side-swept quiff, finish off by blow-drying to the side you want to sweep it to.
What you should be left with once you’re finished drying is a soft, textured finish that’s responsive and easy to work with.
If you really want a wavy finish, however, you could accentuate the effect by using a round brush while blow-drying instead (or in addition to) using your fingers.
5. Blow-Dry With A Round Brush
If you’re looking for more of a wavy finish with flips and light curls, use a round brush. It’s also great if you’re looking for a high-volume quiff.
Only use it where you want this effect – if this is the front, only do it at the front. If you wanted to do it throughout the top, this is fine too.
Brush upward with the round brush and then wrap (i.e twist) sections of the hair around the round brush and gently lock it into place with some pressure and medium heat from a blow-dryer.
Be careful not to tug too hard or cause soreness.
The end result will be fluffy, light, and wavy.
If you wanted to, you could leave it at that. However, if you want to add a bit more texture and also some hold to help it stay in place, proceed to Steps 6 and/or 7.
6. Use A Matte Product
You’ll need to be careful here.
When you’re looking for a light and airy finish, using a heavy or greasy product is not what you want to be doing.
If you did want to use a product at this point, be intentional with the type of product you choose.
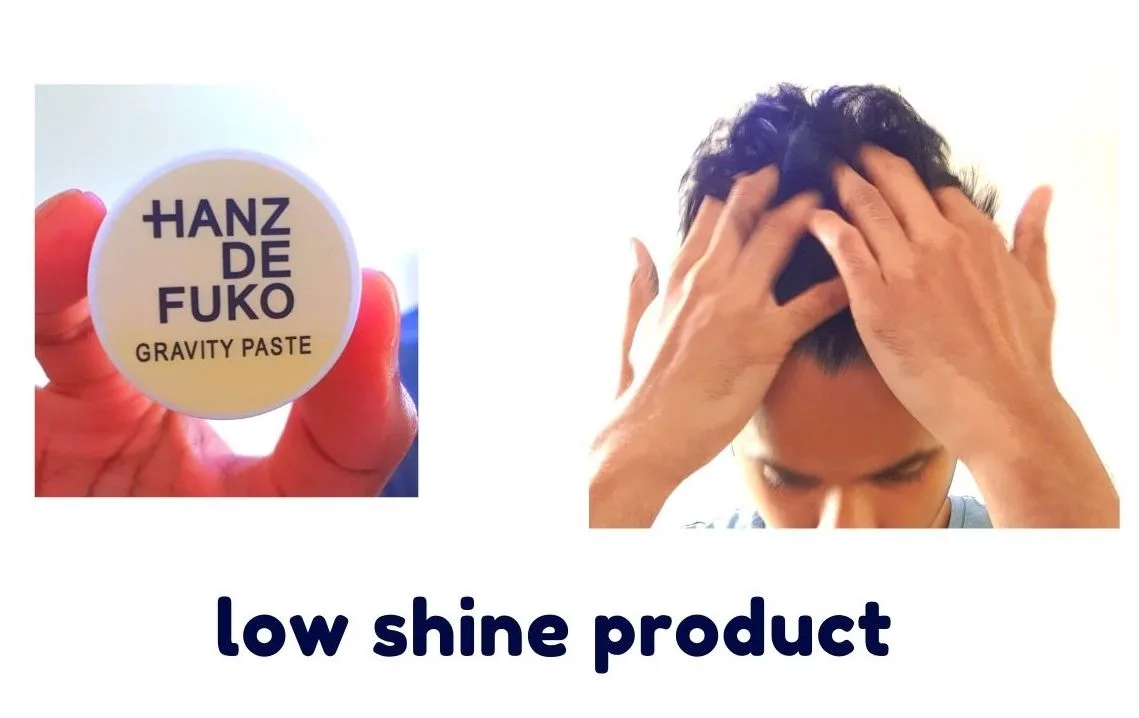
Also, if you wanted to skip the product altogether, this is fine. A light to medium hold hairspray that produces a pliable finish may be enough. If you think this is the case, skip the product and go to Step 7.
As I mentioned in the “3 Secrets” earlier in this post, go for a product with a light to medium hold and a matte or low shine finish.
In addition, use a small amount.
The minimum amount to get the job done.
Using too much will simply weigh down the hair and prevent you from getting the lift you’re looking for here.
A light layer of product is what you’re aiming for.
Use your fingers to tousle and build an even more textured and layered appearance if you want to.
- Suitable Products – Creams, pastes, mousses, volumizing powders
- Unsuitable Products – Pomades, waxes, gels
Experiment and find the one that gives you the texture and hold you need.
I use Hanz De Fuko Gravity Paste with pretty good effect here (Amazon Link).
Label M Matt Paste is another one I use when I’m looking for a light and textured finish (Amazon Link).
7. Lock It In With A Light Hairspray
If all you wanted was to keep that fluffy end result in place after blow-drying, a light layer of hair spray may be all you need.
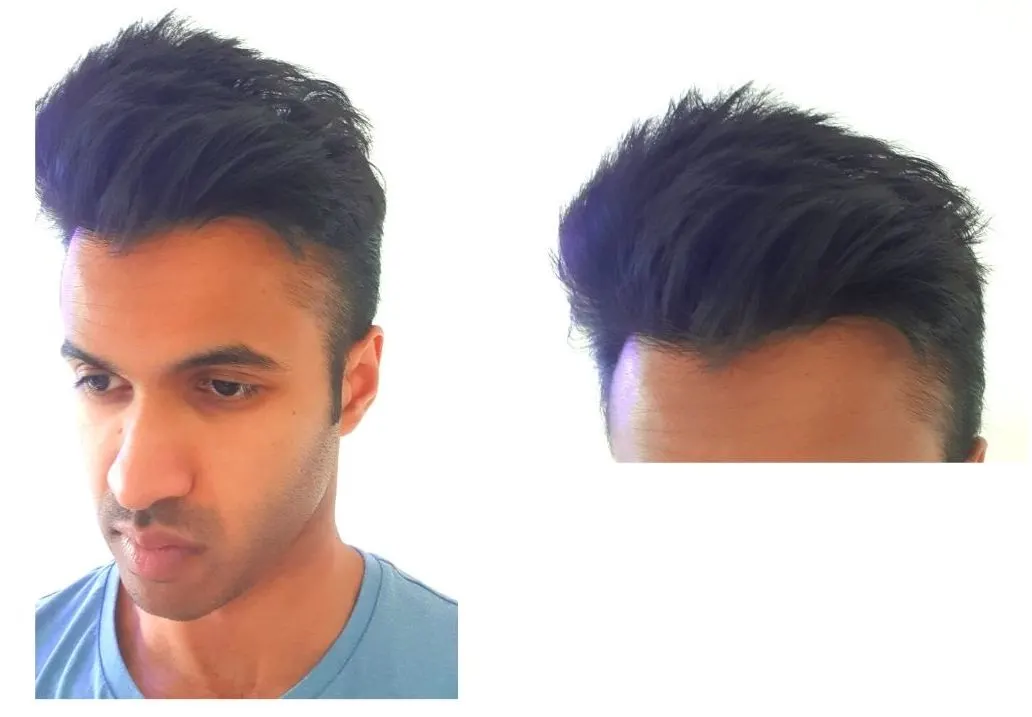
You avoid having to apply other hair products which may well just weigh it down. Alternatively, you could apply the hair spray after applying the hair product if you really want that additional hold.
Just remember, the more product and hairspray you apply, the more you risk weighing it all down and the harder it’ll be to achieve that lift you want.
Conclusion
There you have it. The secrets and steps to getting an effortlessly light and textured hairstyle.
Enjoy.
Ready Sleek founder. Obsessed with casual style and the minimalist approach to building a highly functional wardrobe. Also a fan of classic, vintage hairstyles.

![How To Get Fluffy Hair In 7 Easy Steps [Men’s Guide]](https://www.readysleek.com/wp-content/uploads/2021/07/How-to-get-fluffy-hair-720x405.jpeg)
