Resourcefulness is a great trait to have when it comes to style.
Some of you may have already noticed how hats can be used to flatten hair that sticks out. Or, you may simply be wondering whether you should do it.
Either way, read on to avoid any errors.
Should You Flatten Your Hair With A Hat?
Hats can be used to flatten hair as the sustained pressure will lay them flat. Washing and styling before putting the hat on and applying some product afterward will often lead to a better and flatter result.
Hats can often make hair stay flatter for long. It’ll also feel smoother with less frizz and fewer flyaways.

It’s important to note that although hats can be used to flatten hair, they shouldn’t be used excessively.
Keeping the hair under traction for prolonged periods of time is not good for it.
But keeping it on for short periods as and when required would certainly help flatten things out.
It’s also worth noting that there are other ways of flattening hair, both on the sides and the top.
Although that’s the gist, I’m going to go through some specific and actionable tips you can use in your routine to get the most effective outcome possible.
8 Tips For Flattening Your Hair With A Hat
Experiment with these to find the solutions that work best for your hair.
1. Wash It With Conditioner First
If you aren’t keen on using a conditioner, you should wash it at the very least.
The reason for this is that washed and clean hair is a lot more cooperative than greasy and unclean hair.
When you’re looking to flatten it with a hat, ensuring it’s clean before attempting to do so will make it a lot more likely that it’ll work.
Another reason for washing it first is that you want it to be clean before you put the hat on. If it’s not, the grease and impurities will simply transfer onto the hat.
Sure, washing the hat regularly will make this issue less important. But if you don’t, those impurities will simply transfer back onto the hair when you put it on.
The reason that conditioner is worth considering is that it often helps with flattening out the hair.
It leaves it feeling softer, smoother, and more moisturized. It sort of weighs down the hair, making it more likely to lay flat instead of stick out.
2. Slightly Damp Hair Can Work Well
Many find that flattening damp hair with a hat is easier than flattening dry hair.
Be careful here – slightly damp hair is what you should go for. Avoid wearing a hat over soaking wet hair. Keeping wet hair under traction with a hat will most likely lead to breakages.
But allowing slightly damp hair to dry under a hat will often make your flattening efforts more effective.
It’ll look smoother – less frizzy and with fewer flyaways once you’ve taken that hat off.
3. Comb Or Brush It First
Before you put the hat on, try and style it – at least to a certain extent.
It’s usually best to apply the styling product after you’ve taken the hat off. But before putting it on, you could at the very least comb or brush it the way you want it.
This is because it’ll be tougher to do it once it’s been set in place by the hat.
For example, if you want to style a side-slicked comb over to the right, comb before you put the hat on.
Another example – you could slick all of the hair back and then put the hat on. Using accessories such as hats is actually a good way of training the hair to slick back.
Either way, once you’re reasonably happy with the result, carefully put the hat on and try your best not to displace things too much as you do so.
It’s great because the hat will make it more likely that your combed or brushed style will stay that way.
The pressure from the hat will give it some reinforcement and should leave it looking neater.
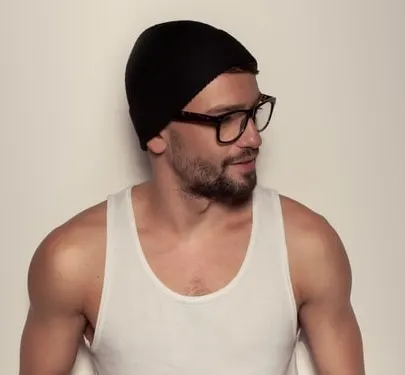
4. Beanies Work Best
Beanie hats work well for flattening hair – this is for a couple of different reasons.
For one, they’re soft and comfortable to wear, as long as they fit relatively well.
But they work especially well for this purpose because they get a good, even, and uniform wrap on most of the hair.
You cover the front, sides, and back.
Compare this with a different type of hat. Let’s take a fedora as a random example. They’re taller and won’t get as tight of a seal over the hair.
In addition, they also won’t flatten hair on the sides. If anything, it’ll make the hair on the sides worse because the hair will puff out at the bottom of the hat.
A beanie is a good option – probably the best one out there. A baseball cap would give you a similar seal but you’ve still got the problem of the sides not being flattened (and potentially made even worse).
Just ensure that the beanie isn’t too tight. As we’ll discuss in the next tip, this will do more harm than good.
5. Not For Too Long
Doing anything excessively never usually leads to a good outcome.
Using hats to flatten hair is no exception.
Although the pressure you get from a hat is great for laying hair flat, keeping it under stress for too long is not a good idea.
This is known as traction and can lead to breakages.
Because of this, be aware of how long you’re keeping the hat on for and how frequently you’re using this technique.
In addition, ensure that the hat you’re using isn’t too tight. You want the hair under a bit of tension but not excessively. It shouldn’t feel uncomfortable.
Leaving the beanie hat on for 10 minutes or so after a shower and towel-dry should be fine.
This should be enough time to get the job done.
6. Follow It Up With Styling Product
Although hat flattening is a reasonably good technique, you’ll often find that it isn’t quite enough.
It may temporarily look smooth and flat after you’ve taken off the hat, but after a couple of hours, you’ll probably find that strays and flyaways start to rear their heads once again.
The way to tackle this problem is to get some additional support from a trusted styling product.
Something you can apply after you’ve taken off the hat in order to keep things in place for the long haul.
This is important because you don’t want to have to keep popping the hat on whenever you start to see stray hairs sticking out during the course of the day.
You want a styling product with a reasonable level of hold in order to keep strays at bay.
What you choose really depends on the finish you want.
If you’re looking for some shine – pomades, waxes, and gels would be good options.
If you’re looking for a low shine or matte finish – clays, pastes, and creams would be better options.
Whatever you use, don’t do too much. You don’t want to risk undoing the hard work you’ve done with the hat.
Use the minimal amount. Apply a light layer over the hair, flattening out any flyaways you see.
If you’re finding that this isn’t enough to do the trick, try applying a small amount and styling before you put the hat on instead.
If you’re still struggling, a few spritzes of hairspray after you’ve taken the hat off should be enough to keep things in place.
7. Keep The Hat Clean
When using the hat for this somewhat unorthodox purpose, it’s important that you keep it clean.
This is especially important if you’re applying some styling product before putting the hat on, as this will start to gum up the inside of the hat over time.
Add that to sweat and general grime and you’ve got a problem.
It’ll be comfortable to wear and also leave your freshly washed hair looking greasier and oilier than it otherwise would. This will make the hair less cooperative and harder to lay flat.
So, wash the hat regularly in order to avoid this.
8. Consider Other Accessories
Hats work well, but they aren’t all that there is.
Other accessories can produce similar – but not identical effects.
For example, headbands, hairnets, hair bands, and durags.
You’ll note that most of them won’t cover all of the hair in the same way that a beanie hat would, for instance.
But if, for example, the hair that you wanted to flatten was at the front only, a headband may be appropriate.
If your hair was on the longer side, a hairband may be effective as well. It’s pretty useful when you’re training to slick the hair back.
To sum that up, if you aren’t finding hats especially useful, it’s worth trying a couple of other accessories to see if you get better results.
Conclusion
There you have it.
Hopefully, you’ve now got a better understanding of this somewhat unusual hair styling topic. It isn’t discussed very often.
Now that you’ve learned the tips, try them out to see which ones work best for you.
Enjoy.
Axel is the founder of ReadySleek and has spent over 5 years researching and testing men’s grooming products, skincare routines, and hair loss treatments. His work combines hands-on product testing with insights from dermatologists and trichologists to deliver evidence-based grooming advice.
He specializes in men’s skincare (including ingredient analysis of retinol, niacinamide, and SPF), hair loss science (minoxidil, finasteride, hair transplants), men’s fragrance (with 80+ colognes personally tested), and body grooming techniques.
When he’s not reviewing the latest grooming products, Axel focuses on making complex grooming topics accessible and actionable for everyday guys.