Skip to Content

A Guide To Trimming Your Chest Hair Before Waxing It

December 28, 2019 · Dilshan
A Guide To Trimming Your Chest Hair Before Waxing It

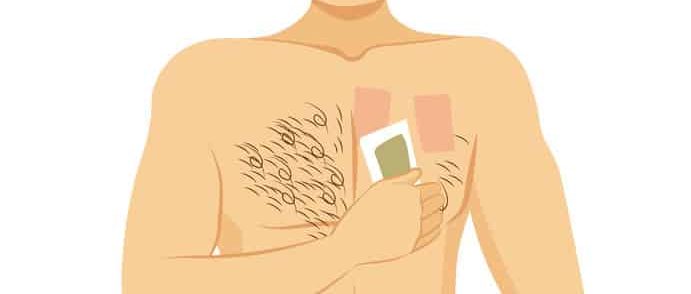
When done correctly, waxing chest hair can produce a dazzlingly smooth result. But when done incorrectly it can lead to a painful, regretful mess. A question often asked is this. Should you trim your chest hair before waxing it?

In general, yes. But it depends on the length at which it currently stands. A ¼ inch is an ideal length when it comes to waxing chest hair. If it’s shorter than this, the wax strips won’t be able to grip onto it. If it’s significantly longer than this, it can make it just as difficult to pull out. The best practice would be to grow it out to longer than a ¼ inch, then trim down to ¼ inch, and then wax it off. 

That’s the gist of it. If you go to a professional to get your chest waxing done, you won’t have to worry about this.

They’ll almost always offer to trim it down for you. After all, it makes their job infinitely easier. 

But if you’re intending on going DIY with your chest waxing efforts, this article will be all the more useful for you. 

I’m going to hone in on why trimming your chest hair prior to waxing it is so useful. I’ll then give you a brief step-by-step routine on how you should trim it. 

Let’s get to work. 

3 Reasons You Should Trim Your Chest Hair Before Waxing It

These may not be the only reasons, but in my opinion, they’re the most important ones.

After reading them, hopefully, you won’t even think twice. 

1. It gives it an even, predictable length

The problem with having chest hair strands of different lengths is that the removal won’t be as effective. 

The wax strips will grip onto some hairs and not others, and ultimately this leads to all of the hairs being pulled less effectively

Slapping on a clipper attachment guard is an easy way to ensure that you get a very even cut at a very specific length in all of your chest hair. This is invaluable and makes a huge difference when it comes time to waxing. 

It will feel more comfortable and look a lot better afterward. 

Having your chest hair cut to an even length also makes it much easier for you to determine the direction of hair growth. The wax strip should be pulled off in the opposite direction to that of hair growth. 

2. It makes the chest hair short enough

Waxing long hair is always a bad idea. If you do manage to remove some hair, it probably won’t be in the healthiest of ways. 

When you try to wax long chest hair, it’s quite likely that the hair will break. It won’t be a clean, swift removal at root-level like you were hoping for. It will most likely just be a breakage above or below the skin surface. 

Breakages below the skin surface are what usually lead to ingrown hairs. 

Long hair is also troublesome because it buries surrounding hairs. The wax simply can’t get hold of this buried hair at all, so they’ll remain just as they were. 

It can be tempting to try to wax everything from the outset without trimming first, but you’ll quickly realize just how uncomfortable and ineffective it is. 

As I said before, a ¼ inch is a good length to work with. Most clippers and trimmers have attachment guards that’ll allow you to achieve this.

This length is short enough to allow for a clean break at the surface of the skin, and also prevents individual hairs from interfering with each other. 

3. It prevents you from going too short

The beauty of using a clipper or trimmer is that you have complete control, as I mentioned before. You set it to a specific length and you’re done. 

By doing this, you ensure that you aren’t going too short. Going shorter than ¼ inch is usually not a good idea. You risk going so short that the wax strip just can’t get a good grip on it. 

There needs to be something for the wax strip to work with. 
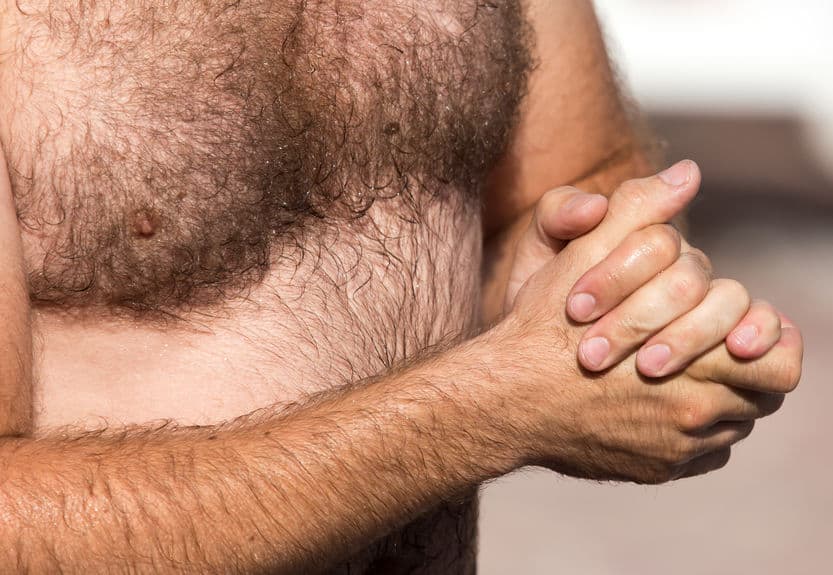
This is why shaving before a wax session is usually a waste of time. You’ll then need to wait for 7 – 10 days for enough chest hair to grow before you can wax it. It isn’t the end of the world, but a bit of a waste of time.

Trimming or clipping that hair would’ve made more sense. 

However, trimming your chest hair with scissors before a waxing session generally isn’t a good idea. It’s difficult to ensure an even length when you trim with scissors. 

Generally, some hairs will be longer than others. Some may be too long, and some too short. You’ll probably agree that it can be very difficult to estimate hair length with your own eyes. That’s why the numbered attachment guards of a trimmer or clipper are so useful. 

Uneven chest hair isn’t great for waxing

How To Trim Your Chest Hair Before Waxing It

Nothing special here. It’s probably the same way as you usually would. Making sure the chest hair is trimmed evenly is more important before waxing, however. 

Here’s a brief step-by-step routine to help you through it. Again, if you were going to get your wax done by a professional, they would almost certainly do this step for you. But if you were going DIY, here’s what you do. 

Step 1. Exfoliate

I’d say this was an essential step before any trimming session. It’s actually one of my crucial tips for trimming chest hair without itching

What it refers to is the physical removal of dirt and dead cells from the top layer of chest skin.

This layer of gunk would otherwise obstruct the path of the blade, causing irritation and subsequent itching. 

More relevant to this article, it will also eventually lead to a more comfortable and easier waxing session. The bases of the hairs aren’t mattified by this layer of excess oil and dirt, and so they’re easier to pull out

A physical exfoliating scrub can do wonders. It’s quick to do and cheap as well. Trust me, it’s worth it. 

Step 2. Trim it all down with a ¼ inch guard 

Once you’ve towel-dried your chest, it’s time to get to work. 

Nothing fancy here. Simply slap on your ¼ inch attachment guard (which almost all trimmers and clippers come with) and start trimming. 

Don’t leave any area untouched. It all needs to go. 

The areas immediately above and beneath the collarbone can be difficult to trim. These are probably the only areas I’d suggest trimming with scissors if you’re finding it difficult to do so with trimmers. 

Keep the skin gently taut to help you catch the trickier hairs in the more difficult areas.

Chest hair grows in all sorts of directions, so vary the angle of your trimmer to catch them all. Go up, down, left, and right. 

If you notice that you simply aren’t catching any hairs, you’ve got one of two problems. Either the attachment guard isn’t fixed correctly, or your chest hair is actually shorter than ¼ inch. 

If it is shorter than ¼ inch, you’ll have to wait a few days before you can get waxed in the first place. 

 Step 3. Rinse off the excess hair 

Review your chest. If you’re happy that you’ve trimmed all the areas of your chest you’d like to wax, you can safely say you’re done. 

I told you this was straightforward. Rinse off the trimmed hair in the shower. Avoid harsh soaps at this point as your skin is likely to be irritated from the exfoliating and trimming session. 

Gently towel-dry it and admire your work. 

Step 4. Moisturize well

If you weren’t going to imminently start waxing, it’s definitely a good idea to moisturize. Trimmed skin is going to be irritated, and irritated chest skin needs moisture

In the days leading up to your waxing session, it’s important to moisturize your chest well.

Well-moisturized skin is much easier to wax as it allows the wax strip to release more effectively. Note that here, the moisture is in the skin. 

However, on the day of your waxing session, do not moisturize your chest. Sounds contradictory, I know. But the reason is that recently moisturized skin makes it difficult for the wax strip to get a grip on. This is simply because it feels greasier and more slippery

Basically, the moisture would be on the skin and not in the skin. This isn’t helpful when it comes to waxing. 

Can’t I Just Leave It At That? 

Of course you can. After your heroic chest trimming session, you may well find that you like the way it looks. 

Personally, I love the way trimmed chest hair looks. It can look pretty natural when done well. 

So, you may actually decide that this is good enough and you don’t end up going for that waxing session after all. 

It might actually save you a bit of money in the end and you don’t have to go through the discomfort of being waxed. Win. 

The Difference Between Trimming vs Waxing Chest Hair

The main difference is that with trimming, you’re simply cutting the chest hair at a level above the surface of the skin. It doesn’t remove it at the root-level. 

It’s similar to a lawnmower cutting grass. The blade is cutting the grass above the level of the soil, but not actually removing the root of the grass itself. 

In contrast, waxing actually removes the chest hair from the root itself. This generally leads to a much neater and cleaner result. If this is what you want, waxing may be ideal. 

The result lasts longer with waxing, and so you’d need fewer waxing sessions than you would need trimming sessions. With waxing, you would have more time before you get that irritating chest stubble.

In terms of what “looks better”, this is subjective. Some men love the look and feel of a waxed chest.

You won’t get anything as smooth after trimming or even shaving. Shaving doesn’t remove the hair at the root-level. It simply cuts the hair strand even closer to the surface of the skin. 

But other men may find that a waxed chest looks “obvious” or “unnatural”.

It ultimately depends on your personal preference. If you were curious, check out some photos online. If you were even more curious, try it out for yourself and see whether it’s for you. 

You may not like the result, but that’s fine. Trust me, it’ll grow back and you can revert to trimming from then on. 

Does Waxing Chest Hair Hurt?

Because you’re removing the hair at a deeper level, waxing is more uncomfortable than trimming. 

Some might say it was painful. But ensuring that you’re trimmed properly beforehand and moisturized well before your waxing session should reduce the discomfort you experience.  

If you go to a professional, they’ll most likely have their own methods for minimizing discomfort. For example, they might use cold compresses and toners. Some may even suggest numbing cream, although this probably won’t be necessary. 

Avoid hot showers and tight-fitting clothing in the 24 hours following your chest waxing session. They’ll worsen the irritation. 

Remember to moisturize well after your waxing session. Once again, irritated skin needs moisture. 

Ultimately, if you get it done by a professional, your pain will be less. They’ll know all the tricks and their technique will be a lot better. 

The technique is important when it comes to waxing, both in terms of your comfort as well as the end result. Speed and direction of waxing are both important factors they’ll prioritize. 

Conclusion

To summarize, yes, trimming chest hair is usually essential in order to wax it properly. Not too short, not too long – just right. 

Fortunately, trimmers and clippers allow for precision and accuracy. You want an even cut to allow the wax strips to get hold of it properly. 

Doing this will also allow you to see what your chest looks like after it’s been trimmed. You may well decide this is the look you want to go with and cancel that waxing session after all. 

Hopefully, this article has given you some pretty in-depth knowledge of the subject. As with most body grooming habits, the better informed you are, the better your outcome.