![The 2mm Haircut: Length, Clipper, Trim Guide [With Photos]](https://wwwreadysleekcom4f890.zapwp.com/q:i/r:0/wp:1/w:400/u:https://www.readysleek.com/wp-content/uploads/2020/12/The-2mm-Haircut-Feature-Image.jpg)
When you buzz down this short there’s no wasted time brushing, combing, or styling. There’s ruggedness and masculinity to that; it’s not hard to see the appeal. You’re about to learn everything you need to know about the 2mm haircut.
Why doesn’t everyone do it?
The first time you run those clippers through your hair is the hardest. It takes courage to see those long locks you’ve nurtured over the years falling to the floor.
But once a man buzzes it’s pretty hard to go back.
You need to know what it looks like, what to use to trim it, and how to trim it yourself.
Let’s be honest – it isn’t difficult. But it’s still worth getting a good idea of what length you’re trimming down to before you do it.
Let’s get to it.
Want it even shorter without going fully bald? The 1mm haircut guide covers the near-shaved look.
What Does A 2mm Hair Length Look Like?
The 2mm hair length is so short that it’s common to see the scalp from certain angles, especially in men with thinner hair.
If it were on the face it would be called light stubble.
There’s no reason why this can’t be used to describe what it looks like on the scalp, because – well, that’s exactly what it looks like.
Here’s what it looks like:


It looks like a shadowing effect on the scalp from front to back, just like light stubble would do for the face.
Although it’s very visible and not as short or subtle as a buzz cut with no guard, it still doesn’t draw much attention at all.
Interestingly, this shadowing effect on the scalp actually adds definition to the top half of the face. It often just looks more chiseled.
But with 2mm’s worth of hair, you really don’t have much choice in terms of style.
An induction buzz cut (2mm haircut all over) would be a popular choice. Or, you could go for a Burr cut; a buzz cut variation where the top is very slightly longer than the back and sides.
The “high and tight” is another variation where the top is left at 2mm but the sides and back are shaved up to the level of the temples (i.e “high”). The sudden transition from shaved sides/back to the 2mm hair on top is what gives it a characteristic look.
But overall, you’re quite limited in terms of style. There’s just not enough hair to work any pomade or wax into, for instance. But that simplicity is probably why you’re drawn to it in the first place.
The 2mm Fade Haircut
In a 2mm fade haircut, the hair on top is 2mm while the sides and back gradually increase in length as you go up toward the top.


In other words, at the sides and back the shortest length is at the bottom, and the hair gradually blends or fades into longer lengths as you up.
The shortest length could be anything less than 2mm; shaved would be the best option here. This is what’s known as a “skin fade”, and it’s another way to make a 2mm haircut look a little more interesting.
But you could always just trim down with no guard instead of shaving to achieve your shortest length.
What Clipper Grade Should You Use For A 2mm Haircut?
The clipper grade you should use for a 2mm haircut would be either a number 0 or a number 0.5, depending on the brand of clipper you’re using.
These would allow you to trim to 1/16 of an inch, or 1.58mm. Unfortunately, most clippers do not come with clipper guards that will allow you to trim down to exactly 2mm.
The #0.5 guard for Wahl clippers or the #0 guard for Andis and Oster clippers will get you down to 1.58mm though which for many men will be close enough.
If you’d prefer to go slightly longer than 2mm instead of slightly shorter, go for the #1 guard; this will get you to 3mm.
It is possible to achieve almost exactly 2mm if the clipper you’re using comes with a lever on the side. Most of the cheaper ones don’t.
If yours doesn’t come with a lever, it’s probably best to skip the next couple of lines as it might confuse things. But if you’ve got one, consider this.
Opening your clipper’s lever (i.e pulling it backward) and trimming with no clipper guard attached (i.e just the blade) will allow you to trim down to almost 2mm exactly.
But this is only true if the blade size is around 0.5mm – 0.8mm (as most standard ones are). It’s definitely worth checking first.
What’s The Best Clipper For A 2mm Haircut?
The Wahl Color Pro or Magic Clips are both good options for DIY trimmers looking to achieve a 2mm haircut. They’re high quality but also reasonably priced.
For men on a budget, the Color Pro (Amazon Link) would be best. It gets the job done.
But for men with a little bit of extra cash to spend on a more versatile and powerful clipper, the Magic Clips (Amazon Link) may be a better option. It comes with a taper lever so you’ll have more control over length.
They’ll both come with #0.5 and #1 guard combs, so you’ll be able to get to 1.5mm and 3mm respectively with no trouble at all.
If you go for the Magic Clips, open the lever (pull it backward) and trim with no guard attached; you’ll be at 2mm almost exactly.
How To Trim A 2mm Haircut All Over
This is a simple, step-by-step routine you can follow to trim the perfect 2mm induction buzz cut.
You’ll learn how to trim down to 2mm (or nearly 2mm) in all directions, in the most effective way possible.
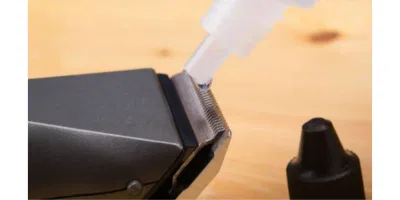
1. Get Your Clipper Ready
The clipper will need to be charged, cleaned, and oiled to work at its best.
Charged clippers are efficient, while low-battery clippers are slow and tug and pull as they trim.
Clean around the blade to remove any leftover hair clogging it up. Use the tiny little brush all clippers come with to do this.
Oil will also go a long way. Your clipper should have come with some. Just a couple of drops will help the comb-like teeth work so much smoother.
2. Wash And Dry The Hair
Washing and drying the hair will make it easier for the clipper to glide through it. Greasy hair doesn’t trim as well and will lead to tugging and unevenness.
Blow-dry it and make sure it’s completely dry before clipping. Dry hair is easier, and more importantly, safer, to run an electric clipper through.
3. Trim The Top And Sides Close To 2mm
Remember, you may not be able to get down to exactly 2mm. The #0.5 (for Wahl) or #0 (for Andis or Oster) will get you down to 1.5mm.
The #1 will get you to 3mm.
If your clipper has a lever and a blade size of 0.5 – 0.8mm, opening the lever will get you to almost exactly 2mm.
Work with what you’ve got – a millimeter here or there won’t make a huge amount of difference to the look.
Start trimming the top and sides; it’s usually best to leave the back until last.
Trim against the grain (i.e against the direction of hair growth) to give you the quickest most even trim. This means trimming backward on top and upward on the sides.
Shake the hair off of the clipper guard from time to time to ensure the hair doesn’t clog and obstruct the trim.
4. Sort Out The Back
The back is tricky because, for one, you can’t really see it properly. A handheld mirror would come in very useful if you’re doing this DIY.
Turn around with your back to your bathroom mirror and hold the handheld mirror in front of you.
This is a great way to see the back of your head in the handheld mirror as it reflects.
Gently place a finger over the clipper guard to help guide it over the uneven surface of the back of the head.
If you can get someone else to do it for you, this would be ideal. If not, don’t worry – just do your best.
Feel around the crown (top of the back) to judge the general direction of hair growth.
Hair tends to grow in different directions in this area so you may need to change up the angle of the clipper to trim against the grain.
The good thing about trimming as short as 2mm is that it’s short enough for uneven patches you’ve missed to look quite obvious. Good lighting will help you spot them.
Run your fingers over your scalp as well to feel for any hair patches you’ve missed and swiftly deal with them.
5. Square Or Round Off The Neckline
The neckline is the bottom border of the back. It’s where the neck skin meets the hair and should be well-defined and crisp, or tapered.
Defining the neckline DIY can be tricky – once again, asking someone you trust to do it for you would be better.
If you’re doing it yourself, using a guide band to line up your neck will definitely come in handy. The Heband is a comfortable and effective one you should check out.
Conclusion
The 2mm is about as simple as it gets.
That’s what makes it so great. It takes some of the work out of style. No fretting about styling, neatening, washing, or drying.
When it’s this short, it’s all just so easy.
2mm Haircut: Guard Size Chart
The 2mm length doesn’t have a standard guard on every brand. Here’s what to use:
| Clipper Brand | Guard Number | Length |
|---|---|---|
| Wahl | ½ guard | 1.5mm |
| Wahl | #1 guard | 3mm (⅛ inch) |
| Andis | ½ guard | 1.5mm |
| BaByliss | Adjustable | 2mm setting |
| Philips | Adjustable | 2mm setting |
Pro tip: For a true 2mm, you’ll need either an adjustable clipper or a ½ guard (1.5mm) — which is very close. The #1 guard at 3mm is slightly longer. Many men find the adjustable lever on clippers like the Wahl Senior helps dial in that in-between 2mm length.
How To Ask Your Barber For A 2mm Haircut
A 2mm buzz cut is very short. Here’s how to make sure your barber gets it right:
- Say: “A half guard all over” or “Between a 0 and a 1, as close to 2mm as possible”
- Be clear about uniformity: “I want the same length all over — no fade, no taper”
- If you want a fade: “2mm on the sides, blended to a 4 on top”
- Manage expectations: At 2mm, the scalp will be visible — especially with light or thin hair
Remember: a 2mm cut shows significant scalp. If that’s not what you want, ask for a 3mm (#1 guard) instead — the difference is noticeable.
Frequently Asked Questions
What guard number is 2mm?
There’s no standard 2mm guard on Wahl or Andis clippers. The ½ guard gives you 1.5mm and the #1 guard gives 3mm. For an exact 2mm, you’ll need an adjustable clipper (like Philips Norelco) that lets you dial in the precise length, or use the taper lever to adjust between settings.
Can you see the scalp with a 2mm haircut?
Yes, you can see the scalp with a 2mm haircut, especially on men with lighter hair or thinner density. At 2mm, it’s essentially a very short buzz cut that’s close to being shaved. Men with dark, thick hair will show less scalp than those with lighter, finer hair.
Is a 2mm haircut the same as a number 1?
Not exactly. A #1 guard on most clippers (Wahl, Andis) is 3mm, which is slightly longer than 2mm. The closest standard guard to 2mm is the ½ guard at 1.5mm. The difference between 2mm and 3mm is subtle but visible, especially around the hairline.
How fast does a 2mm haircut grow out?
A 2mm haircut grows out noticeably within about 1-2 weeks. Hair grows approximately 0.3-0.4mm per day, so after a week your 2mm will be closer to 4-5mm. To maintain the 2mm length, you’ll need to trim every 5-7 days.
Related Articles
Axel is the founder of ReadySleek and has spent over 5 years researching and testing men’s grooming products, skincare routines, and hair loss treatments. His work combines hands-on product testing with insights from dermatologists and trichologists to deliver evidence-based grooming advice.
He specializes in men’s skincare (including ingredient analysis of retinol, niacinamide, and SPF), hair loss science (minoxidil, finasteride, hair transplants), men’s fragrance (with 80+ colognes personally tested), and body grooming techniques.
When he’s not reviewing the latest grooming products, Axel focuses on making complex grooming topics accessible and actionable for everyday guys.