Predicting what you’ll look like with a new haircut length can be tricky. Many simply think of it as a roll of the dice – but it doesn’t have to be. Here’s everything you need to know about the 12mm haircut.
It’s a length that’s versatile, easy to maintain, and great for DIY trims.
You need to know what to use to achieve it with a pair of home clippers. You also need to know what it looks like so you aren’t just trimming away and hoping for the best.
I’ll also be running through a quick routine you can use to trim a DIY 12mm haircut in the most effective way possible. It’ll look fantastic each and every time.
Let’s get to it.
What Clipper Guard Number For A 12mm Haircut?
The clipper guard number that will achieve closest to a 12mm haircut is the number 4. It will trim down to ½ an inch.
Although this amounts to 13mm to be more precise, it’s so close to our magic number that it really is the best option.
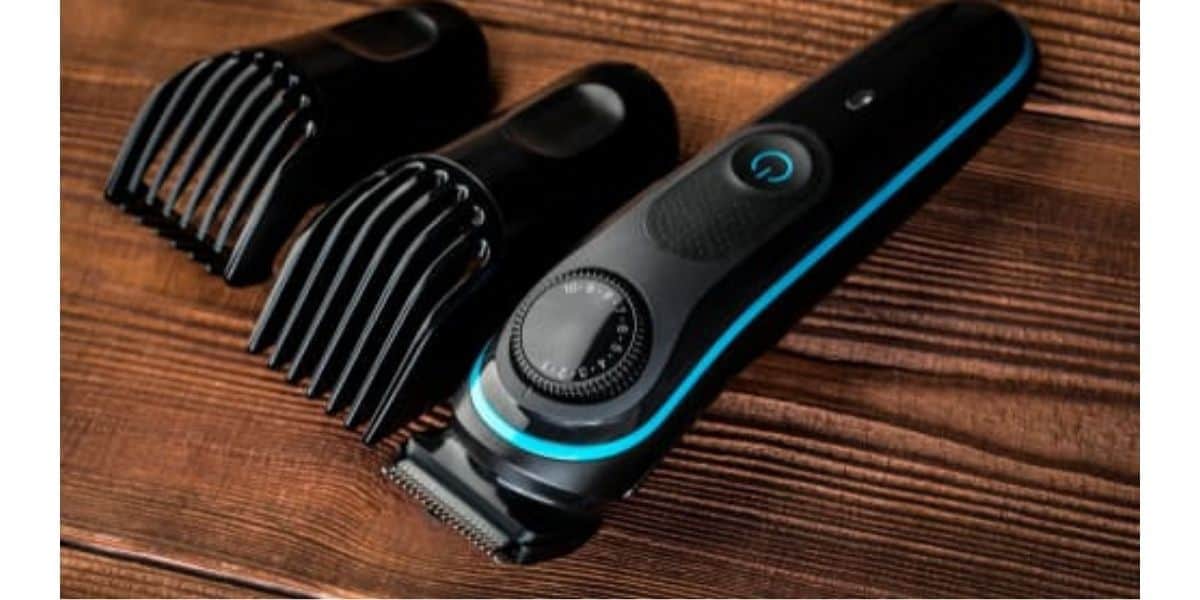
Most hair clippers will come with a #4 guard, but if you’re buying yourself a new one you should really check the product description to make sure it does.
Some clippers come with a lever which you can “open” or “close”.
Opening the lever raises the blade slightly so you trim less hair (i.e leave it longer).
Closing the lever with a #4 clipper guard attached will trim down to exactly 12mm.
Opening the lever with a #4 attached would be a way you could get a length in between a #4 and a #5 if you preferred this.
What Does A 12mm Haircut All Over Look Like?
A 12mm haircut “all over” could also be called a 12mm induction-style buzz cut.
It looks like this:
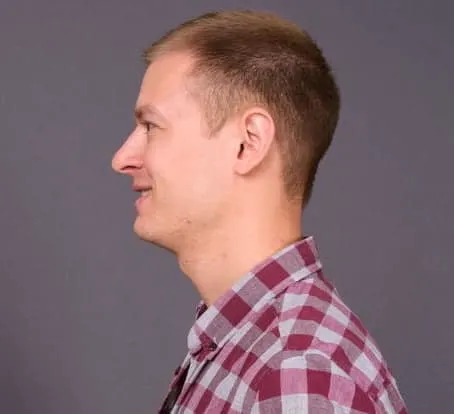
As you can see, it’s short enough to be considered effortlessly tidy, while still being long enough to not expose the scalp.
It’s sophisticated, yet simple.
There’s plenty you could do with 12mm’s worth of hair. It doesn’t need to be trimmed down to 12mm all over.
You could keep the top at 12mm while trimming the sides down to a #2 (6mm) or a #3 (9mm), for instance. This tapered style is very popular.
Trimming the sides shorter actually produces a nice slimming effect for the face and adds definition to the jawline. Keeping the whole of the head at 12mm can sometimes produce a “fuzz ball” appearance as it grows longer.
You could fade the sides and back so that the length very gradually increases in length as you go up toward the top.
Or, you could keep the sides and back short (eg. a #0 or a #1) with a very sudden and sharp transition to the 12mm on top.
This is called a “high and tight” and has a fantastic, clean-cut, and masculine aesthetic.
Although 12mm is a versatile hair length, it’s not quite long enough to style properly. You may be able to pull off a very short quiff. But you’d probably struggle.

This length is better suited to buzz cuts, high-and-tights, crew cuts, or other short styles.
How To Trim A 12mm Haircut In 6 Steps
Here’s a simple, step-by-step routine you can use to trim a fantastic “12mm all over” haircut at home.
All you really need is a pair of electric hair clippers and your bathroom mirror. A handheld mirror would come in useful for the back too.
That’s the beauty of it – it’s so simple.
Having said that, you may find it tricky to DIY at first. If you’ve got a partner you rely on to do it for you, it’ll probably be better for the first couple of tries.
1. Clean And Charge Your Clipper
Preparing your clipper before you start is so important. Put simply, it needs to be clean and it needs to be charged.
Clippers will get clogged with hair over time. Clogged blades are slow and ineffective, leading to tugging, pulling, and uneven trims.
To clean out that hair, as well as any other dirt or grime that collects around the blades, use a tiny little brush. Most clippers will come with one.
A lot of clippers will also come with a small bottle of oil to keep the blades nicely lubricated.
Use this regularly to make sure the comb-like teeth of the blade are able to slide effortlessly past each other. It’ll lead to less friction and better trims.
Finally, you’ll want to keep your clipper charged if it’s cordless. A clipper that isn’t charged is slow or will start to slow during the trim. Again, this leads to tugging, pulling, and a bad trim.
2. Wash And Dry
Clean hair will always be easier to trim than greasy hair. Apply a small dab of shampoo and wash your hair with lukewarm water.
Once you’ve done this, either towel-dry or blow-dry.
It’s easy to use hair clippers on dry hair. More importantly, for safety reasons, never use electric devices on wet hair.
3. Clip The Top And Sides
Before we start it’s important to note that you don’t have to start in any particular area. When trimming a 12mm haircut all over, you’ve got the freedom to start trimming wherever you want to.
Many men prefer to leave the back until last because it’s generally the hardest area to do properly.
Let’s assume you’re starting with the sides, then moving on to the top, and then tackling the back.
Put on your #4 guard (½ inch) to get as close to that 12mm mark as possible.
Once you’ve done that, decide what you want to do with the lever (if your clipper has one). As I mentioned earlier, pushing it forward (closed) will trim slightly shorter than if you were to push it back (open).
Once you’ve decided, start trimming the sides.
You need to trim against the grain, which means against the direction of hair growth. On the sides, the general direction will usually be downward, which means you trim upward.
This is the most efficient way of trimming large amounts of hair quickly and evenly.
Pull your ear gently forward and trim the area behind it – this is otherwise easy to miss.
Once you’re done, start trimming the top. As hair generally grows forward here, you’ll want to trim backward to go against the grain.
As you’re trimming, you’ll notice hair collecting on the tips of the clipper guard. Shake this off from time to time because it’ll start to obstruct your trim.
4. Deal With The Back
The back can be a bit of a pain, particularly if you’re doing it yourself. When you’re trimming as short as 12mm (or nearly 12mm like we are), it’s short enough for missed patches to look quite obvious.
The back is tricky to do properly because the back of the head is naturally quite uneven, with plenty of dips and grooves you need to trim over.
Plus, it’s difficult to see the back of your head.
That’s why a handheld mirror would come in handy. You can turn around, hold the handheld mirror in front of you, and see the back of your head as it reflects off of the large bathroom mirror behind you.
The crown area can be tricky as well because hair tends to grow in all sorts of directions, which makes trimming against the grain quite difficult.
If you’re able to get someone else to do the back for you, this is perfect. If you’re doing it yourself, try putting a finger on the edge of the clipper guard to help guide it past the dips.
Switching hands from time to time can sometimes help if you’re finding a particular area awkward to do.
5. Fine-Tune
Run your fingers through your hair to feel for any uneven areas and to also judge the general direction of hair growth.
It’s especially important for the back and should help ensure you get an even trim despite the area being difficult to see properly.
Feeling is sometimes even better than looking for picking out areas that you’ve missed. Sometimes, patchy areas you’ve missed can be difficult to see properly due to bad light in the bathroom.
But running your fingers through should help pick these up and trim them when you find them.
6. Shape The Neckline
Just like with the back of your head, in an ideal world, you’d have someone else to do the neckline for you.
The neckline is the border between the skin of the back of your neck and your hair. You can choose to square it off or leave it rounded.
If you’re a little more confident or you’ve got someone quite experienced trimming for you, you could even taper the edges to avoid any harsh lines.
Once you’ve done this, you’re finished.
Use the handheld mirror to review your 12mm haircut from all angles, making sure there’s nothing that looks patchy or odd.
Wash your hair, dry yourself off, and admire your work.
Conclusion
There you have it. Everything you need to know about this glorious haircut length.
It’s simple, it’s elegant, it’s easy to maintain.
Enjoy. Have fun with it.
Ready Sleek founder. Obsessed with casual style and the minimalist approach to building a highly functional wardrobe. Also a fan of classic, vintage hairstyles.

![The 12mm Haircut: Number, Size, Trim Guide [With Photos]](https://www.readysleek.com/wp-content/uploads/2020/12/The-12mm-Haircut-Feature-Image.jpg)

